Squid-Cache is a caching proxy for the Web supporting HTTP, HTTPS, FTP, and more. It reduces bandwidth and improves response times by caching and reusing frequently-requested web pages. Squid optimizes the data flow between client and server to improve performance. Squid offers a rich set of traffic optimization options, most of which are enabled by default for simpler installation and high performance. The latest version of Squid-Cache 3.5.15 released on February 23, 2016.
What’s new in squid 3.5
- Support libecap v1.0
- Authentication helper query extensions
- Support named services
- Upgraded squidclient tool
- Helper support for concurrency channels
- Native FTP Relay
- Receive PROXY protocol, Versions 1 & 2
- Basic authentication MSNT helper changes
1) Add Squid repo on CentOS 6 & 7
We can install latest release of Squid Cache by adding squid cache repo. create a file squid.repo under /etc/yum.repo.d/ and add the below contents.
# For CentOS 6 & 7 #
# nano /etc/yum.repos.d/squid.repo

[squid]
name=Squid repo for CentOS Linux - $basearch
#IL mirror
baseurl=http://www1.ngtech.co.il/repo/centos/$releasever/$basearch/
failovermethod=priority
enabled=1
gpgcheck=0

# yum update
# yum install squid
For Fedora, RHEL & openSUSE we can install from official repository.
# CentOS/RHEL & Upto Fedora 21 #
# yum install squid

# Fedora 22 & later #
# dnf install squid

# For openSUSE #
# zypper install squid
1a) configure squid caching proxy
Use the below steps to configure squid caching proxy server for your environment.
# comment all network and allow your network #
# nano /etc/squid/squid.conf
acl 2g_network src 192.168.0.0/24

# By default it will work with port 3128, leave as it is #
http_port 3128

# Allow http access for your network #
httpd_access allow 2g_network

# Block Specific Website, Create a file /etc/squid/blockwebsites.lst and add domains #
acl blocksitelist dstdomain "/etc/squid/blockwebsites.lst"
http_access deny blocksitelist
Start squid proxy server
# Start squid proxy server on SysVinit System #
# service squid start

# Start squid proxy server on systemd System #
# systemctl start squid
Squid proxy server config & log file location
# squid proxy server config file location #
# /etc/squid/squid.conf

# squid proxy server log file location #
# /var/log/squid/access.log
2) Install & Configure Squid Cache on Ubuntu, Debian & Mint
We can easily Install & Configure Squid Cache on Ubuntu, Debian & Mint system from distribution official repository.
# Install squid proxy server #
$ sudo apt-get install squid

# comment all network and allow your network #
$ sudo nano /etc/squid3/squid.conf
acl 2g_network src 192.168.0.0/24

# Allow http access for your network #
httpd_access allow 2g_network

# Start squid proxy server on SysVinit System #
# service squid start

# Start squid proxy server on systemd System #
# systemctl start squid
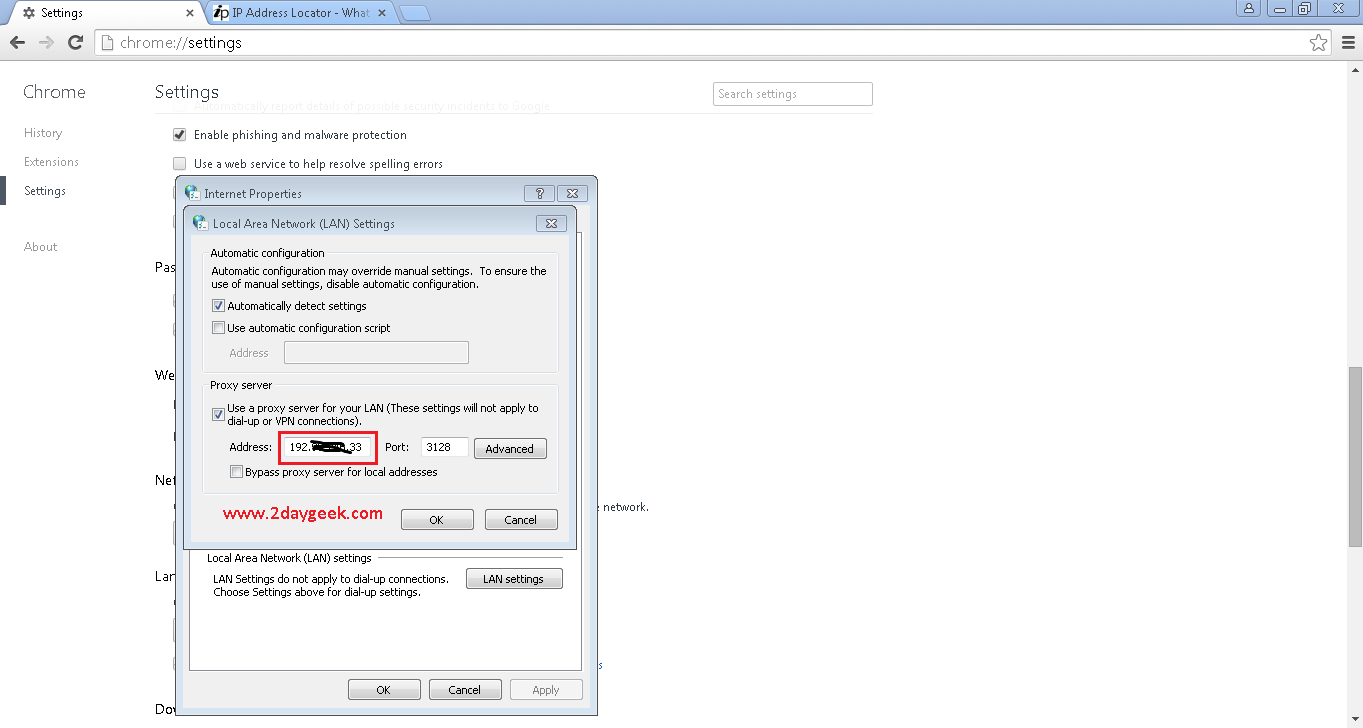
You can configure squid proxy on your browser to make it work. Open google chrome >> Settings >> Advanced Settings >> Network >> Change proxy settings >> LAN Settings >> Proxy server “tick the check box” and enter your squid proxy server IP and port number then save it.

3) Check whether squid working or not
visit @ iplocation.net to get your public IP. Yes, my squid caching proxy working well. Now, all my web access can be routed via squid proxy server.

Cool..)

