3) MariaDB installation
MariaDB is a drop in replacement for MySQL. MariaDB is open-source relational database management system (RDBMS) which is supporting database access. It’s robust, scalable, and reliable SQL server for high availability databases as free of cost.
[Install MariaDB]
$ sudo apt-get install mariadb-server mariadb-client

[Start, enable & status checking systemd System]
$ sudo systemctl start mysql.service
$ sudo systemctl enable mysql.service
$ sudo systemctl status mysql.service

[Start, enable & status checking Sysvinit System]
$ sudo service mysqld start
$ sudo service mysqld status
$ sudo chkconfig mysqld on
3a) Set MySQL root password
By default there is no password for MySQL instant and you need to run the below command to set the root password for security reason. I advise you to secure MySQL installation using mysql_secure_installation method which will set root password and adjust other settings to make more secure.
[MariaDB Secure installation]
$ sudo mysql_secure_installation

NOTE: RUNNING ALL PARTS OF THIS SCRIPT IS RECOMMENDED FOR ALL MariaDB
      SERVERS IN PRODUCTION USE!  PLEASE READ EACH STEP CAREFULLY!

Enter current password for root (enter for none): Press Enter
OK, successfully used password, moving on...

Set root password? [Y/n] y
New password: ******
Re-enter new password: ******
Password updated successfully!
Reloading privilege tables..
 ... Success!

Remove anonymous users? [Y/n] y
 ... Success!

Disallow root login remotely? [Y/n] y
 ... Success!

Remove test database and access to it? [Y/n] y
 - Dropping test database...
 ... Success!
 - Removing privileges on test database...
 ... Success!

Reload privilege tables now? [Y/n] y
 ... Success!

Cleaning up...

All done!  If you've completed all of the above steps, your MariaDB
installation should now be secure.

Thanks for using MariaDB!
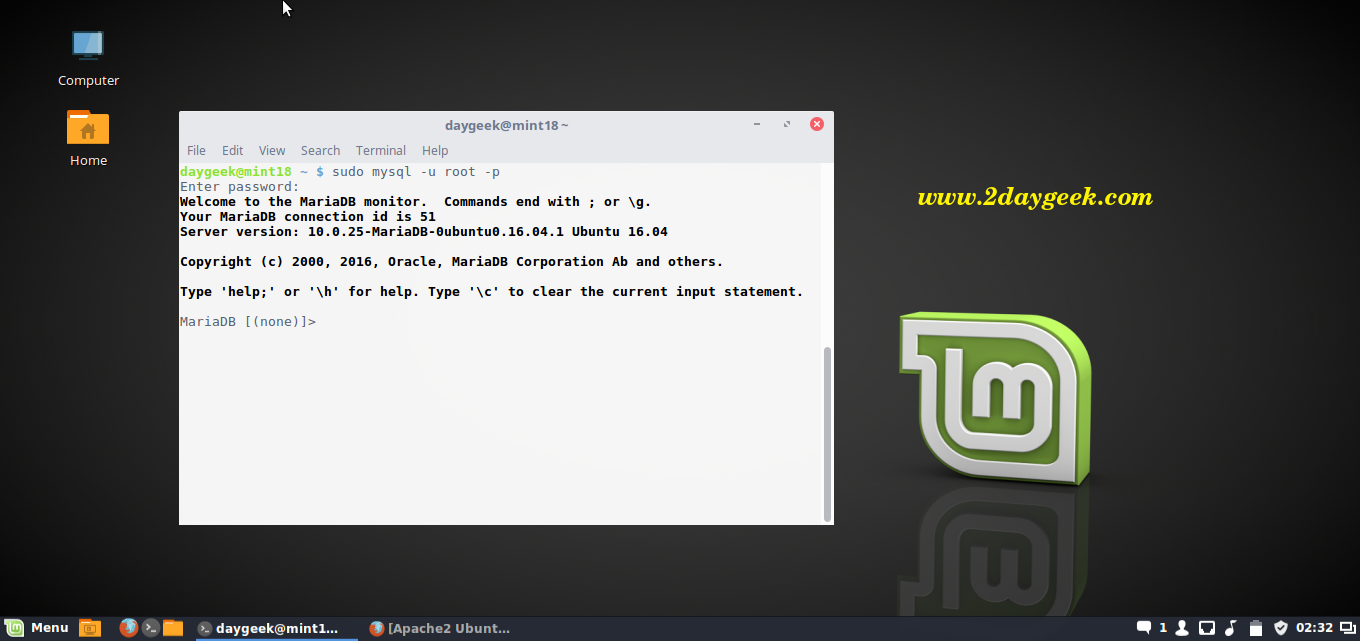
Access the MariaDB database on Terminal by issuing below command.
$ sudo mysql -u root -p
Enter Password: *****


Thank you Magesh,
I use this article as my go-to when installing a LAMP setup.
It works perfect.
I particularly like that you go through the MariaDB setup as well.
Would like to get it as a pdf just in case this website ceases.
Good walkthrough, but the phpMyadmin doesn’t work. A bit lost with the suggestions in the comments. Also, I picked up another walkthrough so I have MySQ installed rather than MariaDB.
Open terminal si copy paste this line
This works for all distros…
sudo ln -s /usr/share/phpmyadmin /var/www/html/phpmyadmin
Hi, I’ve done everything as you’ve said. Everything is working fine, or at least I think so, except phpmyadmin.
I’m getting 404 Not Found error when I check out http://localhost/phpmyadmin
Any idea what may be causing it and on how to get rid of it?
Hey, I got this from Linux Mint community. Apparently, we need to configure apache2.conf to work with Phpmyadmin, and then restart apache.
sudo gedit /etc/apache2/apache2.conf
Include /etc/phpmyadmin/apache.conf
sudo /etc/init.d/apache2 restart
Anyway thank you for taking time out and to put up this post.
If u choose Apache webserver while installing phyadmin, it will automatically include the file.
I need to do the same for being able to access to phpmyadmin.
I follow all the instruction (I’ve done it twice – working on a VM to be sure) and I always get a problem of right between Phpmyadmin & MariaDB
When i want to do something I get this in phpmyadmin
#1044 – Access denied for user ‘phpmyadmin’@’localhost’ to database ‘Joomla’
could You help me?
@frigingoon:disqus,
Good catch, Updated URL link according that.
I did everything you said to do and http://localhost/phpMyAdmin comes up error 404 any suggestions?
I had to just goto http://localhost/phpmyadmin the caps were messing it up
@Rene,
Mint 18 ported with “systemd” daemon, so use according that. It will solve all your problems.
Thanks for the answer, but as I mention before I’m new at linux, can you point me in the right direction where I can check what ‘ “systemd” daemon ‘ means. Thanks for the help.
@Rene,
Please refer the article about systemd @ https://www.2daygeek.com/systemd-vs-sysvinit-commands-cheatsheet/
After some research now I know what you were talking about Mint 18 ported with “systemd”. All is working now. Thanks.
Thumbs up for this Article.
@Rene,
Welcome.
Thanks for the time to post this tutorial, amazing help for newbies like me.
I have couple issues with some of the instructions, can somebody help please.
I have a fresh installation (Mint 18 Sahara 64-bit, Kernel 4.4.0-21-generic x86_64, MATE 1.14.1)
First issue with Apache: , and I was abble to access the Apache page at 127.0.0.1
$ sudo chkconfig httpd on
I got: chkconfig: command not found ,
I just ignored
At mariaDB:
[Start, enable & status checking Sysvinit System]
$ sudo service mysqld start
I got: failed to start mysqld.service: Unit mysqld.service not found
didn’t try the next two instructions after that message.
I continued to nex instruction: mysql_secure_installation,
at root password question when I press ENTER it said: Access denied for user ‘root.localhost’ and keeps asking for it.
Thank you …
Glad to hear you have successfully installed LAMP.
Awesome content mate. I appreciate the write up, had to do a bit of digging with google to find this, but it’s exactly what I needed for my new install of mint 18.
Welcome
Great article! All the steps worked for me. Thank you!
Welcome.
If phpmyadmin does not start add: Include /etc/phpmyadmin/apache.conf
at the end of apache2.conf in etc/apache2/
and restart apache
also you can change the localhost directory from www/html to just www or other in httpd.conf
that is in etc/apache2/sites-enabled
Used to install Bitnami Lamp with less clicks
But I think this is better and run at startup, thanks
hanks for posting . may I copied and re- posted ?
@Agung Zakarika,
No but Backlinks and links are allowed