SSL stands for Secure Sockets Layer. It provides a secure connection between internet browsers and websites/webserver, allowing you to transmit private data securely online. We can install SSL certificate to webserver, website, mail server, dns server, etc..,
SSL transfer sensitive information securely such as credit card payment, net-banking and other login credentials. By default data sent between browsers and web servers as plain text which leads to gain the information by attackers/hackers. If we using SSL which will transfer the data between browsers and web servers securely with encrypted format based on certificate encryption such as 128-bit, 512-bit & 1024-bit and nobody can read it.
Lot of SSL providers available in market like Verisign, symantec, geotrust, thawte, Comodo & RapidSSL and here i’m going to explain how to generate & install self-signed SSL certificate with apache in Linux environment.
1) Install & Enable SSL module
Make sure you should have installed LAMP Setup before proceeding SSL module enable. Use the below commands to install & enable SSL modules.
By default mod_ssl module was installed in Ubuntu/Debian/LinuxMint system and need to enable it by firing below command.
$ sudo a2enmod ssl
For CentOS/RHEL/Fedora systems, Just install the mod_ssl module and it will enable automatically.
# For RHEL/CentOS/Fedora 21 and older systems #
$ yum install mod_ssl openssl

# For Fedora 22 and later systems #
$ dnf install mod_ssl openssl
After SSL module enabled, you have to restart the web server to take the changes effect.
# For RHEL/CentOS/Fedora sysvinit systems #
$ sudo service httpd restart

# For RHEL/CentOS 7 & Fedora systems #
$ sudo systemctl restart httpd.service

# For Ubuntu/Debian/LinuxMint sysvinit systems #
$ sudo service apache2 restart

# For Ubuntu/Debian/LinuxMint systemd systems #
$ sudo systemctl restart apache2.service
2) Create a Self-Signed SSL Certificate
Create ssl directory under Apache or httpd directory to put certificate files.
# Create SSL directory Ubuntu/Debian/LinuxMint system #
$ sudo mkdir /etc/apache2/ssl

# Create SSL directory RHEL/Fedora/CentOS system #
$ sudo mkdir /etc/httpd/ssl
Generate key & certificate for Ubuntu/Debian/LinuxMint system.
$ sudo openssl req -x509 -nodes -days 365 -newkey rsa:2048 -keyout /etc/apache2/ssl/apache.key -out /etc/apache2/ssl/apache.crt
Generating a 2048 bit RSA private key
.......................................................................................+++
.............................................................................................................................................+++
writing new private key to '/etc/apache2/ssl/apache.key'
-----
You are about to be asked to enter information that will be incorporated
into your certificate request.
What you are about to enter is what is called a Distinguished Name or a DN.
There are quite a few fields but you can leave some blank
For some fields there will be a default value,
If you enter '.', the field will be left blank.
-----
Country Name (2 letter code) [AU]:IN
State or Province Name (full name) [Some-State]:Tamil Nadu
Locality Name (eg, city) []:Chennai
Organization Name (eg, company) [Internet Widgits Pty Ltd]:2daygeek
Organizational Unit Name (eg, section) []:Linux Geek
Common Name (e.g. server FQDN or YOUR name) []:2daygeek.com
Email Address []:admin@2daygeek.com
Generate key & certificate for RHEL/Fedora/CentOS system.
$ sudo openssl req -x509 -nodes -days 365 -newkey rsa:2048 -keyout /etc/httpd/ssl/apache.key -out /etc/httpd/ssl/apache.crt
Generating a 2048 bit RSA private key
.......................................................................................+++
.............................................................................................................................................+++
writing new private key to '/etc/httpd/ssl/apache.key'
-----
You are about to be asked to enter information that will be incorporated
into your certificate request.
What you are about to enter is what is called a Distinguished Name or a DN.
There are quite a few fields but you can leave some blank
For some fields there will be a default value,
If you enter '.', the field will be left blank.
-----
Country Name (2 letter code) [AU]:IN
State or Province Name (full name) [Some-State]:Tamil Nadu
Locality Name (eg, city) []:Chennai
Organization Name (eg, company) [Internet Widgits Pty Ltd]:2daygeek
Organizational Unit Name (eg, section) []:Linux Geek
Common Name (e.g. server FQDN or YOUR name) []:2daygeek.com
Email Address []:admin@2daygeek.com
3) Configure Apache to Use SSL
We have certificate and key, It’s time to configure Apache to use SSL by placing the files into virtual host file.
Open the default-ssl.conf file in Ubuntu/Debian/LinuxMint system and modify the below lines based on our certificate location.
$ sudo nano /etc/apache2/sites-available/default-ssl.conf
ServerAdmin admin@example.com
ServerName your_domain.com
ServerAlias www.your_domain.com
DocumentRoot /var/www/html
SSLEngine on
SSLCertificateFile /etc/apache2/ssl/apache.crt
SSLCertificateKeyFile /etc/apache2/ssl/apache.key
Open the ssl.conf file in RHEL/Fedora/CentOS system and modify the below lines based on our certificate location.
$ sudo nano /etc/httpd/conf.d/ssl.conf
ServerAdmin admin@example.com
ServerName your_domain.com
ServerAlias www.your_domain.com
DocumentRoot /var/www/html
SSLEngine on
SSLCertificateFile /etc/httpd/ssl/apache.crt
SSLCertificateKeyFile /etc/httpd/ssl/apache.key
Enable SSL Virtual host for Ubuntu/Debian/LinuxMint system.
$ sudo a2ensite default-ssl.conf
After Configure SSL, you have to restart the web server to take the changes effect.
# For RHEL/CentOS/Fedora sysvinit systems #
$ sudo service httpd restart

# For RHEL/CentOS 7 & Fedora systems #
$ sudo systemctl restart httpd.service

# For Ubuntu/Debian/LinuxMint sysvinit systems #
$ sudo service apache2 restart

# For Ubuntu/Debian/LinuxMint systemd systems #
$ sudo systemctl restart apache2.service
4) Test your SSL & TLS Version
Use the below commands to check your SSL & TLS Version.
# Testing your SSL & TLS Version #
$ openssl s_client -connect localhost:443
CONNECTED(00000003)
depth=0 C = IN, ST = Tamil Nadu, L = Chennai, O = 2daygeek, OU = Linux Geek, CN = daygeek, emailAddress = admin@2daygeek.com
verify error:num=18:self signed certificate
verify return:1
depth=0 C = IN, ST = Tamil Nadu, L = Chennai, O = 2daygeek, OU = Linux Geek, CN = daygeek, emailAddress = admin@2daygeek.com
verify return:1
---
Certificate chain
 0 s:/C=IN/ST=Tamil Nadu/L=Chennai/O=2daygeek/OU=Linux Geek/CN=daygeek/emailAddress=admin@2daygeek.com
   i:/C=IN/ST=Tamil Nadu/L=Chennai/O=2daygeek/OU=Linux Geek/CN=daygeek/emailAddress=admin@2daygeek.com
---
Server certificate
-----BEGIN CERTIFICATE-----
MIID9zCCAt+gAwIBAgIJAOB4xC8Ph0gFMA0GCSqGSIb3DQEBCwUAMIGRMQswCQYD
.
.
/MSw9ojwo+NY3fpZff48/O3a8/pdVXkeoIZ7u9bsFmVh5souQNH0Q5lGGnQ1UTyL
4PUmPzk2PHb7pPw=
-----END CERTIFICATE-----
subject=/C=IN/ST=Tamil Nadu/L=Chennai/O=2daygeek/OU=Linux Geek/CN=daygeek/emailAddress=admin@2daygeek.com
issuer=/C=IN/ST=Tamil Nadu/L=Chennai/O=2daygeek/OU=Linux Geek/CN=daygeek/emailAddress=admin@2daygeek.com
---
No client certificate CA names sent
Peer signing digest: SHA512
Server Temp Key: ECDH, P-256, 256 bits
---
SSL handshake has read 1694 bytes and written 441 bytes
---
New, TLSv1/SSLv3, Cipher is ECDHE-RSA-AES256-GCM-SHA384
Server public key is 2048 bit
Secure Renegotiation IS supported
Compression: NONE
Expansion: NONE
No ALPN negotiated
SSL-Session:
    Protocol  : TLSv1.2
    Cipher    : ECDHE-RSA-AES256-GCM-SHA384
    Session-ID: 3C21A06CB9553B0A647DAB07346B3ED827D3C6A370A366A800C86C432C183CB6
    Session-ID-ctx:
    Master-Key: 0D22759036E15AB05047544114243C2F70350867DDE3A85C968928AAB2B62EC4D2B959F4081341F49226BE15BBC9D585
    Key-Arg   : None
    PSK identity: None
    PSK identity hint: None
    SRP username: None
    TLS session ticket lifetime hint: 300 (seconds)
    TLS session ticket:
    0000 - d9 ad 1e 47 e8 60 04 5f-c2 5b a1 63 29 80 a1 b9   ...G.`._.[.c)...
    0010 - 0f e7 0c 91 0d 18 2e b1-2c 13 99 b4 10 0d 9a 23   ........,......#
    0020 - f0 a7 53 c1 82 1c 7c ed-6a 22 1b f4 b9 b9 db b4   ..S...|.j"......
    0030 - e1 ad 8a 0a 8f 19 32 83-59 f8 ce 5c dd 11 e1 f6   ......2.Y..\....
    0040 - e9 60 a0 bf 90 ee 9d 88-4b 12 33 d2 be b2 1c 52   .`......K.3....R
    0050 - df 1d 78 32 bd bf 4f 04-ba 75 57 9d e2 25 0f bf   ..x2..O..uW..%..
    0060 - cd 81 bb 50 82 79 12 86-72 0a 78 2c 6c eb 8d a3   ...P.y..r.x,l...
    0070 - be 37 4b 0f f0 0d 9b 75-50 95 c9 e0 8c 8d d0 65   .7K....uP......e
    0080 - 53 0f e4 d8 94 ea 56 27-90 4b ab eb 45 82 85 1c   S.....V'.K..E...
    0090 - 99 db 46 5c 9e 76 6e 82-4d 4b cc 46 7e 1e f2 48   ..F\.vn.MK.F~..H
    00a0 - b8 83 96 47 bc 94 1d fd-d3 51 de cf c1 5f 8e d3   ...G.....Q..._..

    Start Time: 1451100191
    Timeout   : 300 (sec)
    Verify return code: 18 (self signed certificate)
---
closed
5) Test your Setup


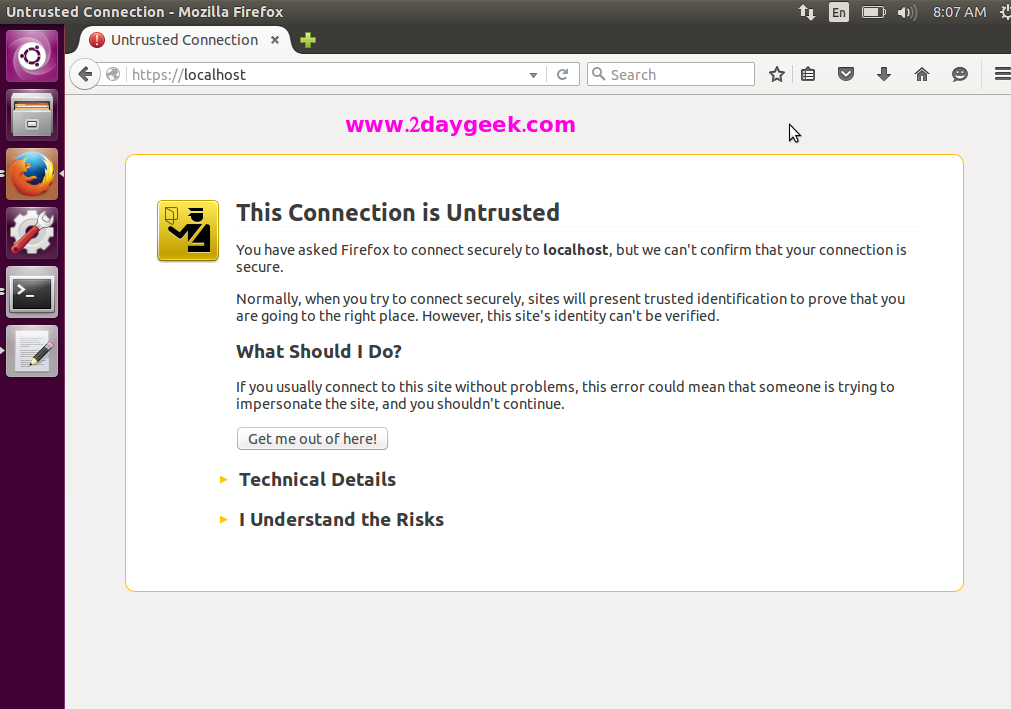
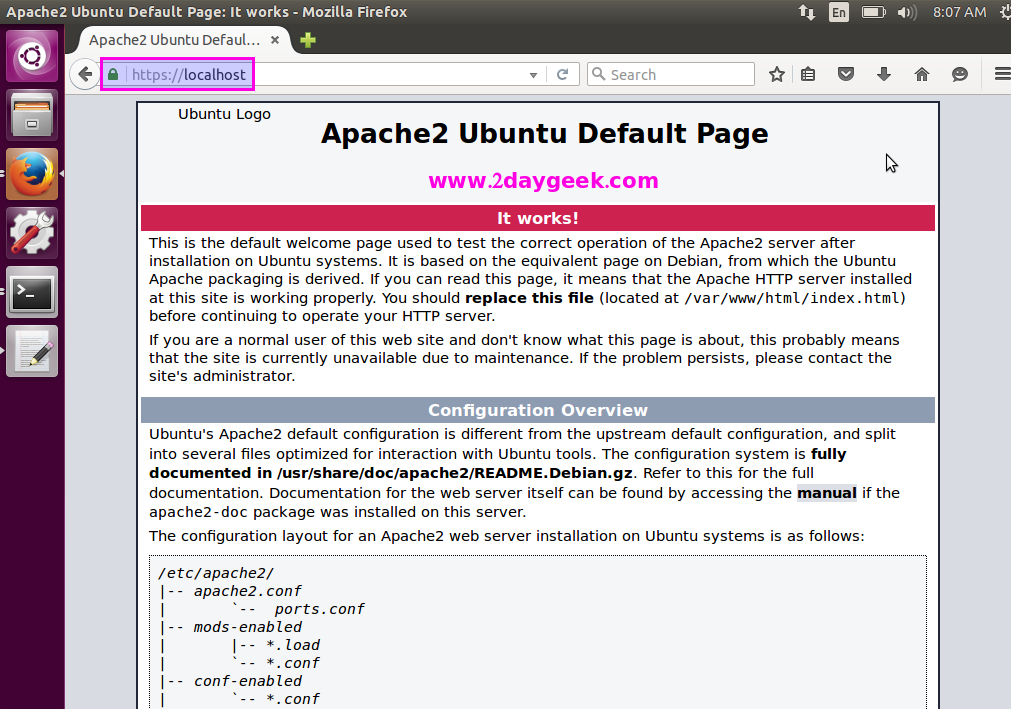
You have successfully installed, enabled & configured SSL with Apache, it’s time to check our new setup by navigating the web browser to to https://localhost/ or https://your-server-ip-address/ or https://127.0.0.1/
Firefox User: Expand I Understand the Risks >> Click Add Exception >> Click Confirm Security Exception.
Chrome User: Click Proceed anyway button.
That’s it, keep rocking to secure your website with SSL enabled.


