You may need to reinstall the GRUB 2 boot loader when the system does not boot into the GRUB menu. This may be due to the installation of security patches or human error.
If the GRUB 2 boot loader corrupted on your system then you will end up with one of the following error messages.
In this guide, we will demonstrate how to repair corrupted GRUB 2 Bootloader in RHEL 8 system.
GRUB 2 Error Message-1
To demonstrate this, let’s remove the grub.cfg file from the system and restart it. If the ‘grub.cfg’ file is missing or corrupted the GRUB 2 boot loader will show the following error message.
rm -rf /boot/grub2/grub.cfg

reboot
After the reboot, you will see the following error message.

Make a note: Your system will continue to work as expected unless you restart it. If you restart, it will end up with the above error message because it did not find the ‘grub.cfg’ file.
GRUB 2 Error Message-2
Similarly, we will delete the ‘grub2’ directory completely from the system and restart it
rm -rf /boot/grub2/

reboot
You will see the following error message in the GRUB 2 menu.

How to Reinstall Corrupted GRUB 2 on RHEL 8
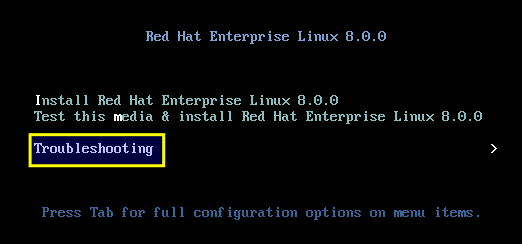
To reinstall or recover the 'grub.cfg' file or 'grub2' directory you need to boot your system with the installation DVD/ISO image. On boot screen of Red Hat 8, Select the ‘Troubleshooting’ option and press enter.
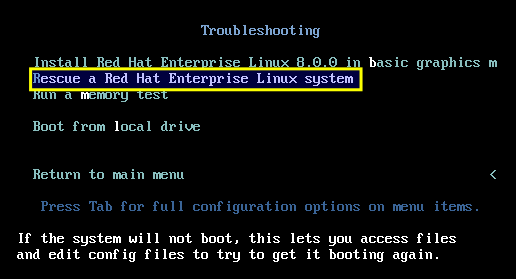
In the next screen, select the ‘Rescue a Red Hat Enterprise Linux system’ option and press enter.
On the next screen, select option ‘1 (Continue)’ and hit ‘ENTER’.
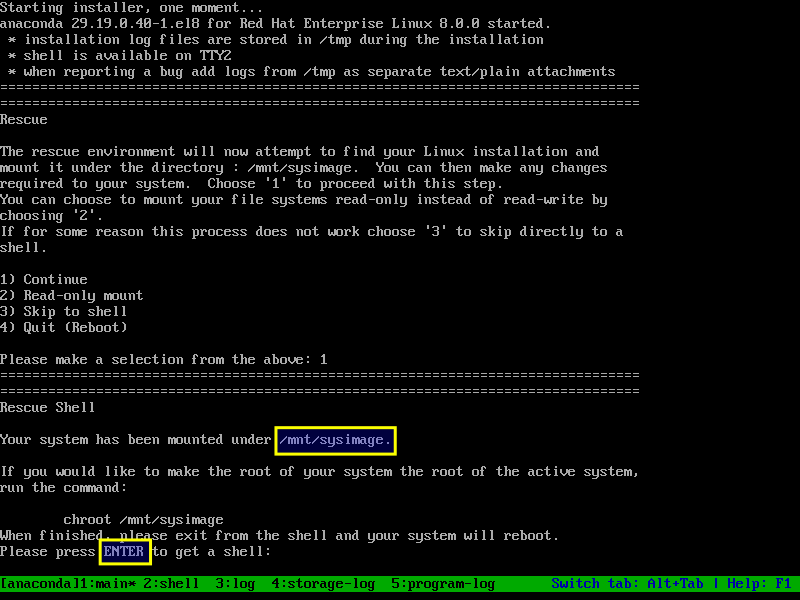
Chroot into the ‘/mnt/sysimage’ directory in order to use the actual root partition instead of Anaconda rescue mode environment root partition.
chroot /mnt/sysimage
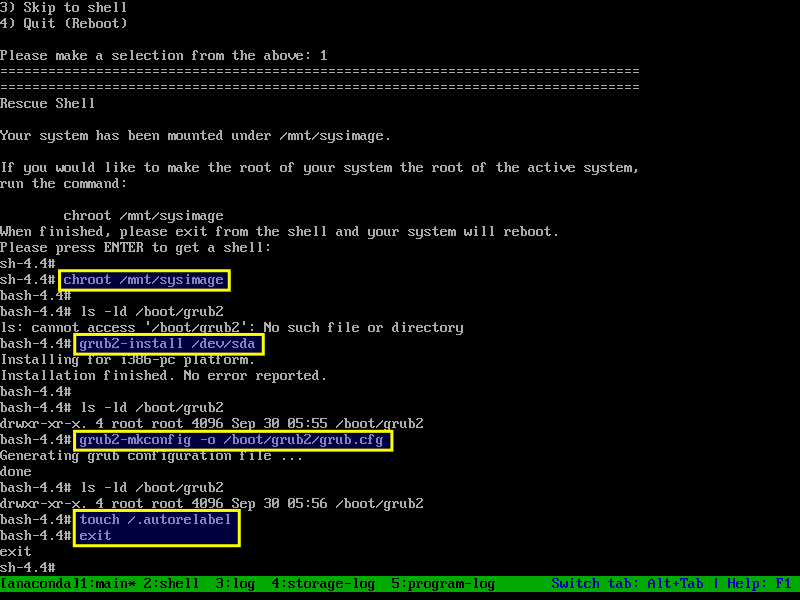
Install GRUB2 in the the primary hard disk, it would be ‘/dev/sda’. The ‘grub-install’ command installs GRUB onto a given device, which includes copying GRUB images into the target directory (generally /boot/grub2).
grub2-install /dev/sda
Create a configuration file for GRUB2. The ‘grub2-mkconfig’ command creates a new configuration file ‘grub.cfg’ based on the current system configuration. This command uses the '/etc/default/grub' file, and the customizable scripts in the directory '/etc/grub.d/' when generating the ‘grub.cfg’ file.
grub2-mkconfig -o /boot/grub2/grub.cfg
Enable the SELinux relabeling process on the next system boot:
touch /.autorelabel
Exit the chroot environment and reboot the system by executing the exit command twice:
exit
exit
Make a note: The system will automatically perform the relabeling process of all files, and the system will automatically restart when the relabeling process is complete.
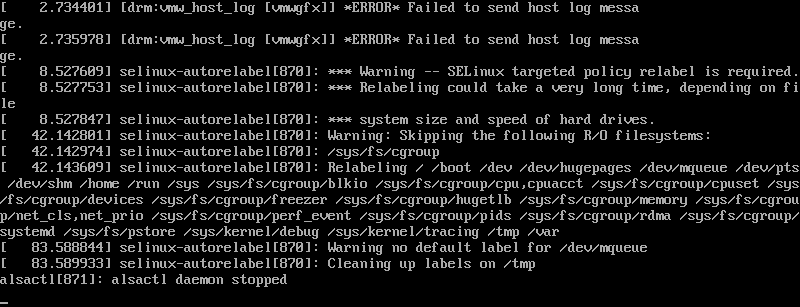
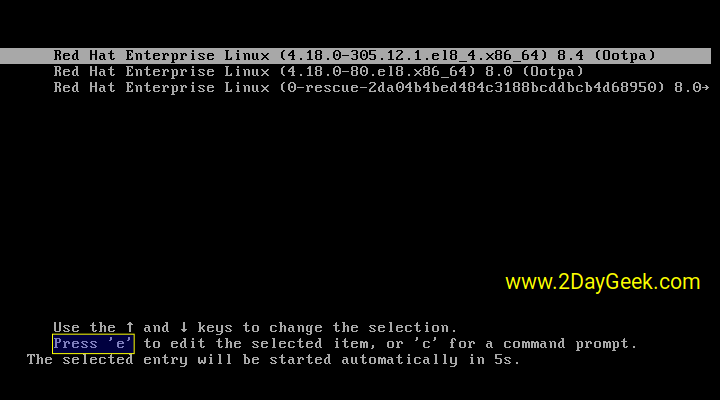
Now, you can able to boot your system with the newly installed bootloader without any issues.
Installing GRUB2 on a UEFI system
On the UEFI based systems, you need to install or re-install appropriate packages:
Re-install the necessary packages.
yum reinstall grub2-efi shim
If the above command ends with an error, install the packages.
yum install grub2-efi shim
Create the ‘grub.cfg’ configuration file using the grub2-mkconfig command:
grub2-mkconfig -o /boot/efi/EFI/redhat/grub.cfg
Wrapping Up
In this guide, we have described how to recover a corrupted GRUB 2 Bootloader in Red Hat (RHEL) 8 system using the Anaconda Rescue Mode from installation DVD/ISO. This same procedure works on other RHEL 8 clones such as CentOS 8, Rocky Linux 8 and AlmaLinux 8.
If you have any questions or feedback, feel free to comment below.



Great domunet !!! thank you
Thank you for this. It was extremely helpful to me today.
Hi,
Thanks a lot
very nice article